Showing posts with label recipes. Show all posts

Thursday, November 17, 2011

Mushroom Philly Cheese Steak


Winter is horrible for my diet. As soon as the cold winds start blowing, all I want to do is curl up on the couch with a warm plate of gooey cheesy hot food and hibernate until it is above 60. Unfortunately, that is not really an option for me, and I am trying to eat as healthy as I can before all of the Thanksgiving/Christmas dinners. 

This morning I was craving a Philly sandwich. I decided to try to make a healthy low carb version in the crock pot as I have been feeling extremely lazy lately. 

This is fast, filling, and healthy :)

Ingredients:
  • 1-1.5 lb. Flank Steak
  • 1 8 oz. package sliced mushrooms
  • 1 large onion, sliced
  • 2 cups beef stock/broth
  • 1 Tbsp. vegetable oil
  • 2 tsp. Italian seasoning
  • Mayo to taste
  • Sliced provolone
  • Buns/wraps of your choice


  1. In a large skillet, heat up the oil and brown the steak on both sides. 
  2. Meanwhile, in the crock pot, place sliced onion, seasoning, and mushrooms. 
  3. Place meat on top and add broth. 
  4. Cover and cook on High for 5 hours or Low for 10. 
  5. Shred meat with two forks and serve on bread of your choice with mayo and cheese. 

Friday, May 6, 2011

Coconut-y Caramel-y Cookie Bars


I am one of the only people in my house who like coconut. The smell, taste, and texture all can send me into a tailspin of overeating faster than the stress of a high school reunion.

There had been a bag of coconut sitting in my cupboard for almost two months. I had originally bought it to make some cute Easter treats, but since I am one of the only people in my house that like coconut, it sat unopened. Every time I opened the door to get any baking supply it would call my name. So today I embraced my cocnut fever and made these cookie bars. When baked, the center of these bars come out somewhat gooey and caramel-esque in flavor, therefore the name of the post.

I hope you enjoy making these as much as I enjoyed eating them!

Ingredients:
1 ½ to 2 cups of coconut
2 cups of packed brown sugar
1 tsp baking powder
2 tsp vanilla extract
1 tsp sea salt
1 ½ cups all-purpose flour
½ cup butter
Cooking spray
3 beaten room temp eggs


First thing you will do is make your cookie’s crust. Preheat your oven to 350. Add ½ cup of the brown sugar, the flour, and butter in a large mixing bowl. Beat with a mixer on low speed until the mix becomes fine and smooth. Spray a 9x13 pan with cooking spray, and using a spoon or spatula, press mixture into the bottom of the pan, coating as evenly as possible. Bake this for 10-15 minutes, until nicely browned.


While this is baking, combine your eggs, the rest of the brown sugar, vanilla, salt, baking powder, and coconut together in a mixing bowl. I use a mixer to combine everything together besides the coconut, preferring to add it last with a spoon to keep the texture of the coconut.


Using your spatula or spoon again, spread the coconut mix over the cookie crust.


Bake an additional 20-25 minutes. You will need to wait until this is cool to the touch to cut, and make sure that you are using a sharp knife, or your pieces will come out wonky. (Then you will have to make the ultimate sacrifice for your family and re-cut them all, eating the scraps so that they look perfect!)

Tuesday, May 3, 2011

Teacher Appreciation Day-Mom's Granola


          Today is Teacher Appreciation Day at our kid’s school. I wanted to give them something special, that was not only heartfelt, but affordable as well. Money is tight right now in our house, as it is for many, and I could not afford to spend $10 or $15 on each teacher, as that would be $75!! Ack. Not gonna happen. I love to bake, and thought about making cupcakes for all of them, but wanted to make them something that they could keep at their desks and munch on.
          At breakfast yesterday morning it dawned on me to make a batch of my granola for them. It could stay on their desk as a snack, or they could take it home. Either way, it would stay good longer than a day or two and is a smidge healthier. Luckily, everything looks like a nice gift when placed in a Mason jar, and I happened to have a whole bunch of them waiting to be filled. Feel free to use the tag I made at the top of this post for yours, the template I modified is from this site. The poem is unfortunately all mine, hey, I was in a hurry :).  
          Here is the recipe I have come up with for granola that MY family likes. Feel free to add or subtract at will, as granola is basically toasted oats with anything you wish to add.

Ingredients:
·         1/2 c vegetable oil
·         4 cups of old fashioned rolled oats
·         1 tsp cinnamon
·         1/3 c of honey
·         1/3 c packed brown sugar
·         2 tsp vanilla extract
·         2 tsp sea salt
·         1/3 c water
·         ½ c each of any dried fruits you want
·         cooking spray
·         foil
·         1 c peanuts, walnuts, or whatever nut you prefer

Heat your oven to 275. In a large bowl place all of the dry ingredients, minus the fruit, which will be added after the granola, have been cooked. In a medium saucepan combine water, honey, brown sugar, and vanilla. Cook over medium heat, stirring occasionally until the sugar is dissolved. Drizzle the wet ingredients into the dry ingredients bowl and combine until the oats appear to have an even coating.
Turn the entire mixture onto a baking sheet covered in foil and sprayed with cooking spray. Cook granola for one hour, mixing the granola every 15 minutes. You can tell when it is finished as it will be a lovely golden brown color.  

Allow to cool completely and then add your dried fruit. We went with some Fit & Active stuff that was very cheap at Aldi. Make sure to add the fruit AFTER the granola has had a chance to cool. This is true for glazed nuts as well. 

A word of caution to all of you: glazed=sugary and delicious (think donuts) so beware. I think I ate more than I put in the granola.

You can make the jars as decorative or as plain as you would like. Since I started on mine after my son's baseball game at 9:00 PM, I opted for a simple clean look (aka time crunched mom chic) and put the label around the mouth of the jar with some pretty ribbon and viola.   

Store in an airtight container and restrain yourself from munching all day long on it. I always mess up this last step. 
On an unrelated note, her is a picture of my son pitching......so worth getting home at 9:00 for :)! 
And a picture of him while "we" were making the granola:
P.S. To all the teachers out there, thank you for all you do!!!!

Monday, May 2, 2011

Green Eggs and No Ham


                    Our weekend was so busy! There was pink eye (don't ask), the flu, sports practices, a baseball game, yard work, a TON of spray painting (pics tomorrow....promise!!!), and grilling. The sun was out and we were outside almost all weekend. With the weather being gloomy and rainy the past, oh, million years, the sun's rays were like prozac for all of out moods. I wanted to share with you all a cute cookie project I did for my son's class last week. They were talking about influential  authors for children in their literature class, and I wanted to bake a treat for them. I love baking so this was as selfish as it was kind, rest assured! My son and I brainstormed over what we wanted our baked good to represent, and we decided that some sort of tribute to Dr. Suess was in order. We are huge Dr, Suess fans in this house, and I must say that his are one of the few books I did not mind reading repeatedly when they were smaller.

                  The angle we took was green eggs. These were very simple to make, and take no more time than a batch of chocolate chip cookies to prepare. I got quite a few calls/emails from moms in Joseph's class thanking me for the cookies, and letting me know how cute and yummy there were. So it is not only me stating that these are a hit :).

Materials needed:
* fun-fetti cake mix
* 2 eggs
* 1/3 cup vegetable oil
* Green food coloring
* Cooking spray
* Aluminum foil

                   First, preheat your oven to 350.  Mix your cake mix, eggs, and oil in a large mixing bowl until combined.
                      Next, you will want to set aside about 1/3 cup of mixed dough and place in medium sized mixing bowl. Add green food coloring a small squirt at a time until the desired color is achieved. Your green egg centers should now look something like this:
                      Now, the fun begins. At this point is where I called in Mason, Claire, and Joseph, and we all set about making these tasty treats. I tried a biscuit cutter, muffin tins, and other methods in order to get the most realistic egg shape, but in the end free-forming them turned out to be the method that gave me a look that I liked. They turned out looking like a fired egg, and also the most realist of the methods we tried.

                   I took a little over a tablespoon of dough for each cookie and placed it on a cooking sheet covered in aluminum foil and sprayed with Pam (did I mention I have no dishwasher and hate dishes?).
Press down with your fingers until you get a shape you like. Remember, if you don't like the end result, you can always roll it into a ball and start again. Also, remember that there is no perfect fried egg shape. The more imperfect the better in this case. Hence the use of children brings the best results here :).

                         While the kids are working on these I got the teaspoon out and made as many small round green balls as there were cookies. After the cookies were formed, I let each kids press them in different spots in the cookies. It was neat to see some in the middle, some at the edge, and all different sizes. While these eggs were obviously  not real, it added a certain air of egg authenticity.
 After all the eggs have the yolks placed you are ready to bake Pop them in for 8-10 minutes, or until very slight golden brown edges begin to appear.

                         Allow to cool for a few minutes and then transfer to a cooling rack before either scarfing them all down or packing them away.

Thursday, April 28, 2011

A mom that can't say no? Me too.....

                   I am sure that many of you can relate to this; you get a call or email from someone asking if you can help out with something at church, school, scouts, on and on and you of course say "yes". You don't think about what else is going on, or when exactly you will find the time to do this, it is just an instinct. We feel guilty if we don't. We just brew ANOTHER pot of coffee and plow through the night. 
                 
                  Last night was one of those for me. I volunteered to help at my children's school with an event called "Market Place 29 A.D.". I had checked off one of the boxes on the take home form that I could help with sewing. I also checked off that I wouldn't mind helping at the actual event. Did I call anyone to see what that would entail? No. I just checked boxes and thought of what a great helper I was. 
                    
                    Fast forward a couple of weeks. The Market Place event is totally out of my mind. I know of no such thing, I get a call. It is one of the other moms. She has fabric and a pattern for me to make scarves for the kiddos. "Oh, yeah", I say. Mind reeling, trying to remember if there where any exact details on the sign up sheet. There were not, of course. Teachers are smart. They know that less details=more volunteers. 
                    
                           I am told that the project is due next Friday. She apologizes that she did not call me sooner, she lost my number. My mind is racing. It IS Easter Week, but I can squeeze it in. (This was Thursday). I let her know that I would be at home the next couple of day with the kids, who were on Easter break. The days pass. She does not show. I start to hope in the far recesses of my mind (the place where you think things you don't like to admit out loud) that she has forgotten, and then felt guilty and finished everything up. 
                     
    Nope. 
                      
                         On Tuesday my neighbor, who is better than any ADT system, lets me know that a woman stopped by while I was gone. There was no call or anything left, so I was hoping that it was a vacuum or knife salesperson. But oh, I knew. Another day goes by. The guilt is gnawing at me pretty constant now.  Did she really do all of them? Was that her that stopped by? 
                      
                        I sent my daughter to her house to ask for the fabric. My daughter reported back that yes, that was her that stopped by. Ugh. Of course it was. She hands me a sack. A grocery sack FULL of torn sheets. Huh? She informs me that I am making around 100 scarves for the kids, every third and fourth grader, to wear on Market Place Day to help shield their faces from the sand that would have been in the marketplace in 29 A.D. 
                        
Oh.
                        
                        Do you think that I started it On Tuesday when I got it? No. That would be realistic. I looked at the sack a few times while watching " The Other Guys" on Netflix. I thought of it while I did dishes. I moved the bag to my craft room before I went to bed. but this was all of the contact I had with the sack full of linen. 


                        Wednesday my son comes home. He has a leather-esque looking booklet with a foreign coin attached. "This is for you mom", he tells me as I am slaving over a hot toaster making all the kids an after school snack of pretzel bread toast. Yum. I glance at it. I choose to ignore it for a bit. Maybe it is not related to Market Place I lie to myself. I cant ignore it anymore. I open it. BAM. 
                        Inside I find my: Day's agenda (this is when I find out I am volunteering form 8:00 until 3:00), my assignment of making leather-like books with all of the kids at a work station, a note that there is a meeting Thursday at 6:00 where I need to bring the completed scarves (what happened to Friday?!?), and a bazillion name tags for all of the kids. 
                             
                        Now I am getting nervous. I know I need to start the scarves. Why have I put it off? "I will start now" I tell myself. But, I had already promised I would throw the Frisbee around for a bit at the park. Joseph has baseball practice, Mason has youth group, and Claire wants to have some mommy time. 
                             
                             Fast forward a few hours. It is now 10:00. I am feeling queasy from procrastination. I could feign being sick and send the scarves to school with Joe, I could get out my liquid stitch and just glue hems in all of this fabric, I could get started. 
                               
                             I send Joe to the store to get me some heavy whipping cream. I need coffee. And cream. This is going to be an all-nighter. I can feel it. I dump the bag of cloth on the floor in the craft room., put on my ear phones, and shut the door. 
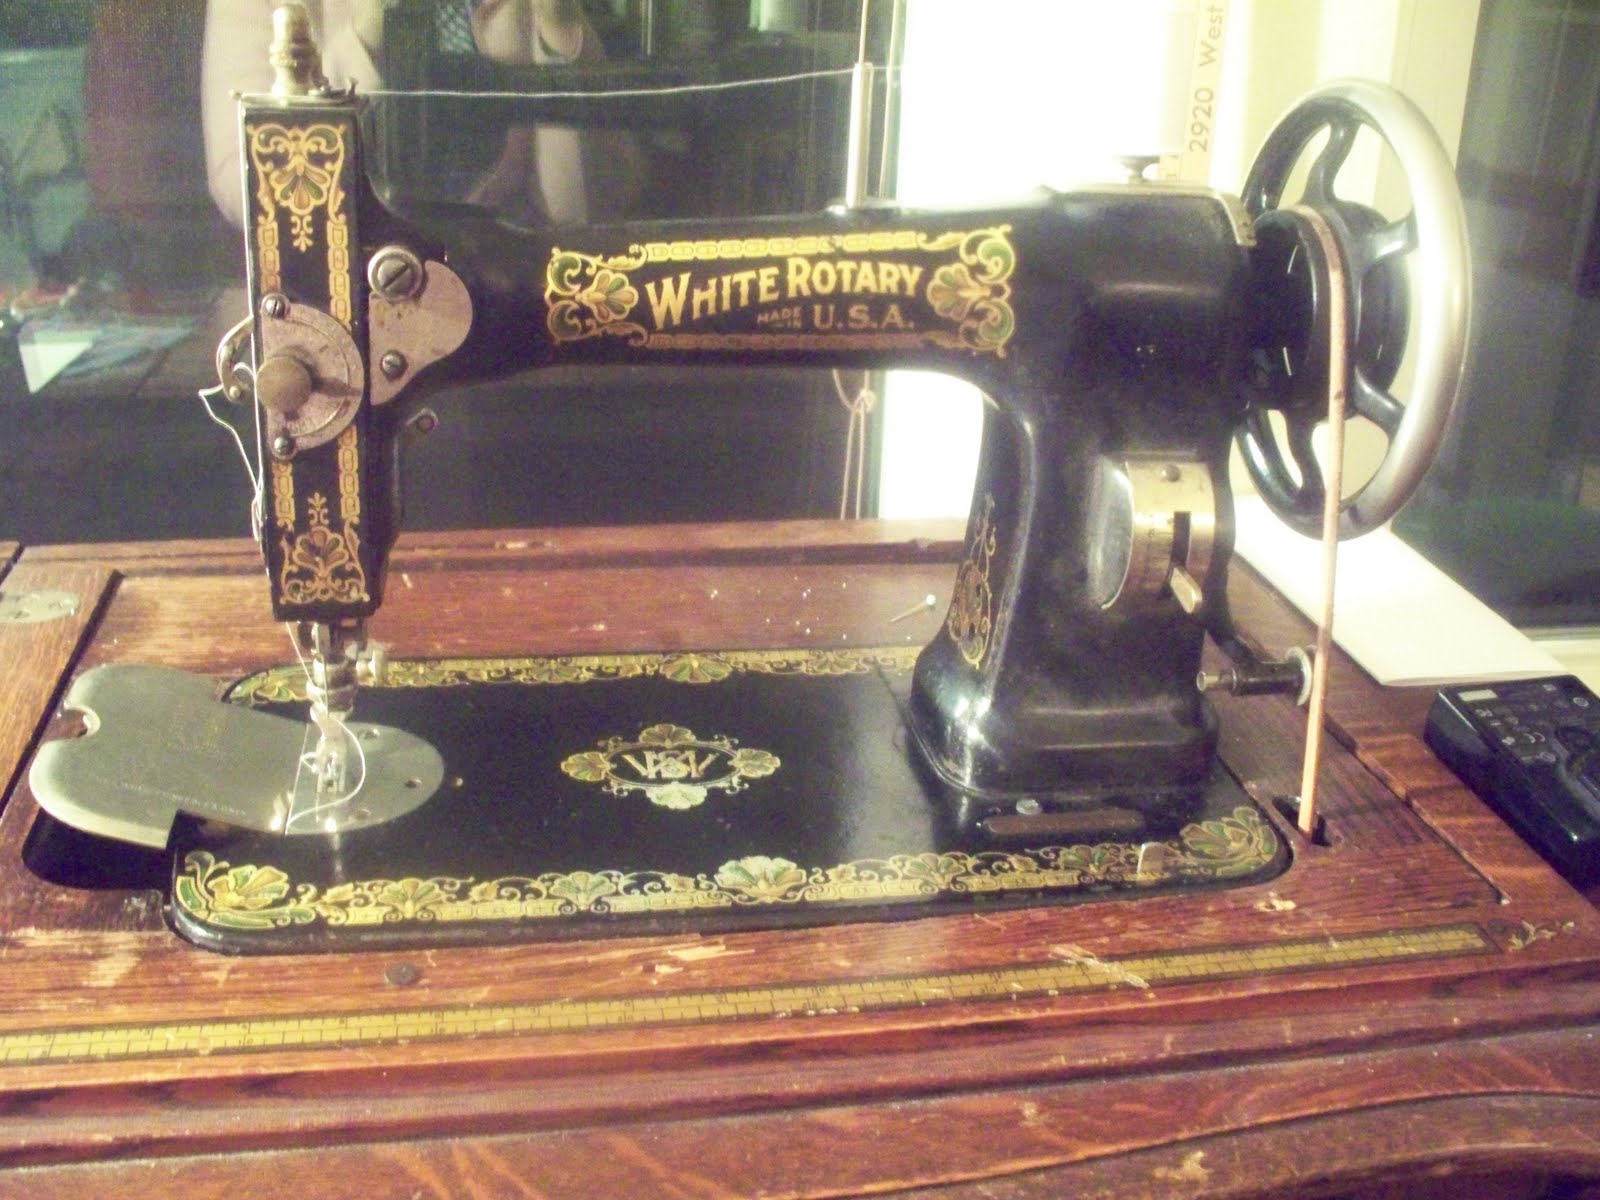
                                  Then I sit down at my treadle. Oh, did I forget to mention I do not have an electric sewing machine? Yes, These would ALL be done by hand, er, foot. 
                                 I start. They all need trimmed and hemmed on three sides. I finish one and want to cry. It took me almost 10 minutes. With ironing and pinning this was going to take forever. I decide to sew by the seat of my pants. I eyeball hem measurements and cut like a mad person. They are coming along more quickly. They don't look perfect, but they will do. I grab my fourth cup of coffee. I am singing along to Muse, moving my feet, feeling pretty awesome. All of a sudden it is 5:00 A.M. 
                               
                              I am done, and want to crawl into the closet and sleep for a few days. Everyone will be getting up soon, and I know that I won't be able to sleep through all the noise, so I decide to make breakfast. Coffee cake sounds good, so I look up a recipe to try.I have never made it, but now on my sixth cup of caffeine induced stupor, I know I can accomplish anything.  I find this great recipe on allrecipes.com and it turns out great. 


                                 Everyone wakes up, gets ready, enjoys breakfast, and is out the door. 
                               
                                I grab ANOTHER cup of coffee, a plate full of coffee cake I swore I would only taste, and brace myself for a l-o-n-g day. 


BUT then
                              My youngest kisses me good-bye and tells me, "I am the best momma and make the best everything!". That makes never saying no worth it :). 


The Delicious Pretzel Bread Recipe- Enjoy!


This is the recipe that is a contest contender currently on thriftyfun.com Please check it out and vote :)


A soft and chewy bread perfect for sandwiches or treats

Ingredients:

  • 1 pkg. active dry yeast (2 1/4 tsp.)
  • 2 Tbsp. heavy cream (room temperature)
  • 1 1/2 Tbsp. brown sugar
  • 4 quarts boiling water
  • 1/3 cup baking soda
  • 1 cup hot water
  • 3 Tbsp. salted butter
  • 1 tsp. kosher salt
  • 2 1/2 - 3 cup flour
  • 2 Tbsp. melted butter
  • salt to taste

Directions:

Add yeast, water, milk, brown sugar, and butter together in a large bowl. Whisk ingredients until combined. Set aside to rest 10 minutes, until frothy. Mix in kosher salt and 2 1/2 cups of flour. As more as needed until desired dough consistency is reached. Dough should be tacky, yet firm. Cover bread with a warm damp towel in bowl for 30 minutes.
Knead dough by hand or machine for 5-10 minutes until dough is shiny and elastic. Place dough back in bowl and recover with warm damp towel for 1 hour.
Your dough should now look like this:

Pre-heat over to 400 degrees F. Bring 4 quarts of water to a rolling boil and slowly add baking soda. (make sure to add in slowly as dumping it all in at once will cause a volcano-like effect that results in lots of clean up...Sadly I have done this more than once, lol)

Remove dough from bowl and punch down. divide into two loaves (or one big one) and shape as wanted. Lower them into the water solution and boil on each side for 15 seconds. Do not leave the loaves longer than 30 seconds total in the solution. Carefully drain off excess water from loaves and place on oiled baking sheet. using a sharp knife cut a giant "X" into each loaf and sprinkle with salt according to taste.
Bake at 400 degrees for 22 minutes, turning pan baking sheet once half way through baking to ensure even baking. Once removed, immediately brush with melted butter to ensure a soft crust. In no time, viola, bakery perfect bread.


Servings:12
Time:15 Minutes Preparation Time
22 Minutes Cooking Time